Leather engraving experiments
I had left over designs from a cancelled bronze casting project. I liked one of them and wanted to laser print it on my leather phone case. First I had to make some experiments with scrap pieces.
So I simply made a vector usable for cuts (0,02mm in Inkscape), but then used a smaller power. The material I used is 3mm thick, industrial, vegetal-tanned cow leather.
I experimented with a couple of different settings before finding results I liked.
Here's the results:
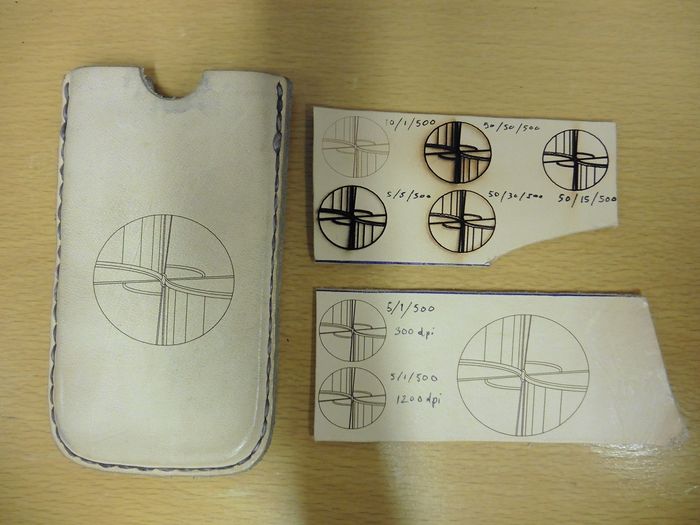
- 50 Speed / 50 Power / 500 Frequency = Thick black lines with a lot of brown near the edges.
- 50 / 30 / 500 = Less burn marks.
- 50 / 15 / 500 = Lines still think and black. Burns only near intersections.
Went for a significant change in power to see how fine I can go
- 10 / 1 /500 = Extremely fine and light lines
- 5 / 5 / 500 = Deep cuts, but not through. Thick black lines but less burning than the first ones.
I noticed small corners on a circle and tried to get rid of them
- 5 / 1 / 500 / 300 dpi = Darker fine lines. Small corners on a circle.
- 5/ 1 / 500 / 1200 dpi = Same but without corners
Turns out the printing dpi affects vector smoothness. I suggest 1200 dpi for all curves.
Using deeper cuts I will be experimenting to make patterns on leather and then bending them to bring out interesting surfaces.
