Difference between revisions of "Silk screens print making"
From Fab Lab Wiki - by NMÍ Kvikan
(→Useful links) |
|||
| (12 intermediate revisions by 5 users not shown) | |||
| Line 1: | Line 1: | ||
| − | == Materials needed == | + | {{languages|Silk_screens_print_making}} |
| + | |||
| + | |||
| + | == How to laser cut your screen == | ||
| + | [[Image:2 screen printing.JPG|thumb|200 px|left|Laser cut your acrylic frames]] | ||
| + | [[Image:3 screen printing.JPG|thumb|200 px|left|Put Mylar between frames with double sided tape]] | ||
| + | [[Image:5 screen printing.JPG|thumb|200 px|left|Laser cutted graphic is ready]] | ||
| + | |||
| + | === Materials needed === | ||
*Anti static bag made of mylar | *Anti static bag made of mylar | ||
| − | * | + | *Acrylic frames |
*Double sided tape | *Double sided tape | ||
| + | *Acryl or textile paint | ||
| + | *Rubber squeegee | ||
| − | == | + | === Design it === |
| + | * Make any design in your 2D graphic vector program like [[Inkscape]]. | ||
| + | * Prepare your screen. Laser cut acrylic frames and put the Mylar between it. | ||
| + | * Put your prepared frame in the laser cutter and raster your design on the Mylar. | ||
| + | * Use a rubber sqeegee to push the paint evenly trough the window onto your fabric. | ||
| + | |||
| + | === Machine settings === | ||
| + | <video type="youtube">ra3VrXnV_Xs</video> | ||
| + | |||
| + | If you are using 35 W Epilog laser use these settings: | ||
*Raster | *Raster | ||
*Auto Focus | *Auto Focus | ||
| Line 10: | Line 29: | ||
*Speed: 1 | *Speed: 1 | ||
*Power: 5 | *Power: 5 | ||
| + | |||
| + | If you want to have solid color on printings you should have your image 100 % black, else you will have bigger dots. | ||
| + | |||
| + | <video type="youtube">1zOH1xy8UUI</video> | ||
| + | |||
| + | |||
| + | |||
| + | |||
| + | |||
| + | == Silkscreen preparing with vinyl cutter == | ||
| + | <gallery> | ||
| + | File:silk-screen-print-tutorial_2.JPG|Prepare your sticker by peeling away the design. | ||
| + | File:silk-screen-print-tutorial_1.JPG|Transfer sticker to window | ||
| + | File:silk-screen-print-tutorial_5.JPG|Use squeegee to push paint trough window | ||
| + | File:silk-screen-print-tutorial_3.JPG|End result on textile | ||
| + | </gallery> | ||
| + | |||
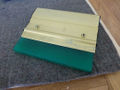
| + | === Materials needed === | ||
| + | *Prepared wooden silkscreen window | ||
| + | *Vinyl cut sticker | ||
| + | *Acryl or textile paint | ||
| + | *Rubber Squeegee | ||
| + | |||
| + | === Design it === | ||
| + | * Make any design in your 2D graphic vector program like [[Inkscape]]. Don't forget to mirror you design. | ||
| + | * Prepare your screen. Vinylcut the sticker and peel away the design instead of the background. | ||
| + | * Then transfer the sticker to the window. | ||
| + | * Use a rubber sqeegee to push the paint evenly trough the window onto your fabric. | ||
| + | |||
| + | |||
| + | |||
| + | |||
| + | |||
| + | == Useful links == | ||
| + | *YouTube: [https://www.youtube.com/watch?v=ND1AUJhdUZc How to screenprint T-shirts using paper stencils] | ||
| + | *YouTube: [https://www.youtube.com/watch?v=uvDpSw3HLsU Cutting stencils with your Cameo] | ||
| + | *Make [http://makezine.com/projects/make-36-boards/vinyl-silk-screen-printing/ Vinyl Silk screen printing] | ||
| − | + | [[Category:Tutorials]] [[Category:Laser_Cutter]] [[Category:Vinyl_Cutter ]] | |
Latest revision as of 21:27, 4 May 2015
English • Deutsch • français • español • íslenska • 日本語 • Nederlands • norsk bokmål • galego • føroyskt • Türkçe •
Contents
How to laser cut your screen


Materials needed
- Anti static bag made of mylar
- Acrylic frames
- Double sided tape
- Acryl or textile paint
- Rubber squeegee
Design it
- Make any design in your 2D graphic vector program like Inkscape.
- Prepare your screen. Laser cut acrylic frames and put the Mylar between it.
- Put your prepared frame in the laser cutter and raster your design on the Mylar.
- Use a rubber sqeegee to push the paint evenly trough the window onto your fabric.
Machine settings
<video type="youtube">ra3VrXnV_Xs</video>
If you are using 35 W Epilog laser use these settings:
- Raster
- Auto Focus
- Resolution: 75dpi
- Speed: 1
- Power: 5
If you want to have solid color on printings you should have your image 100 % black, else you will have bigger dots.
<video type="youtube">1zOH1xy8UUI</video>
Silkscreen preparing with vinyl cutter

Prepare your sticker by peeling away the design.

Transfer sticker to window
Use squeegee to push paint trough window

End result on textile


Materials needed
- Prepared wooden silkscreen window
- Vinyl cut sticker
- Acryl or textile paint
- Rubber Squeegee
Design it
- Make any design in your 2D graphic vector program like Inkscape. Don't forget to mirror you design.
- Prepare your screen. Vinylcut the sticker and peel away the design instead of the background.
- Then transfer the sticker to the window.
- Use a rubber sqeegee to push the paint evenly trough the window onto your fabric.