Inkscape how to make name sticker: Difference between revisions
m typo fix |
m rescaling all img |
||
| Line 9: | Line 9: | ||
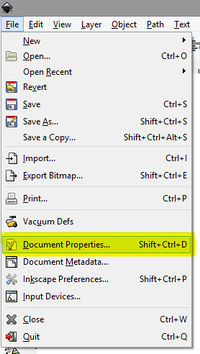
'''1.''' Go to menu > file > document properties. | '''1.''' Go to menu > file > document properties. | ||
[[File:1_how-to-prep_inkscape_document-size.jpg]] | [[File:1_how-to-prep_inkscape_document-size.jpg|200px]] | ||
| Line 18: | Line 20: | ||
Hit enter and close this window. | Hit enter and close this window. | ||
[[File:2_how-to-prep_inkscape_document-size.jpg]] | [[File:2_how-to-prep_inkscape_document-size.jpg|200px]] | ||
| Line 29: | Line 31: | ||
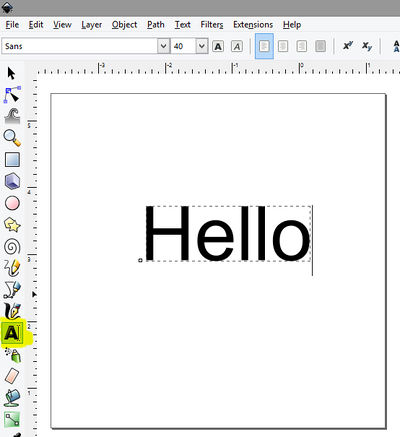
'''3.''' Choose the typetool from the toolbar. Click on your document and type in your name. | '''3.''' Choose the typetool from the toolbar. Click on your document and type in your name. | ||
[[File:14_how-to-prep_inkscape_text-tool.jpg]] | [[File:14_how-to-prep_inkscape_text-tool.jpg|400px]] | ||
| Line 35: | Line 39: | ||
and then you can choose something different in the popdown menu at the top of the screen. | and then you can choose something different in the popdown menu at the top of the screen. | ||
[[File:15_how-to-prep_inkscape_text-tool.jpg]] | [[File:15_how-to-prep_inkscape_text-tool.jpg|400px]] | ||
| Line 48: | Line 52: | ||
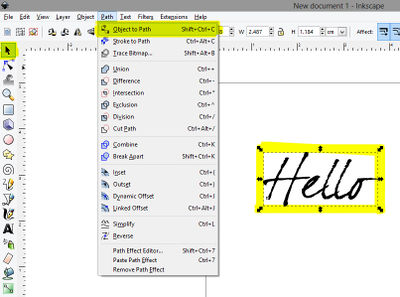
Now go to the menu and choose path > object to path. | Now go to the menu and choose path > object to path. | ||
[[File:16_how-to-prep_inkscape_text-tool.jpg]] | [[File:16_how-to-prep_inkscape_text-tool.jpg|400px]] | ||
| Line 61: | Line 67: | ||
It should make your selected text '''disappear'''. | It should make your selected text '''disappear'''. | ||
[[File:17_how-to-prep_inkscape_text-tool.jpg]] | [[File:17_how-to-prep_inkscape_text-tool.jpg|400px]] | ||
| Line 70: | Line 79: | ||
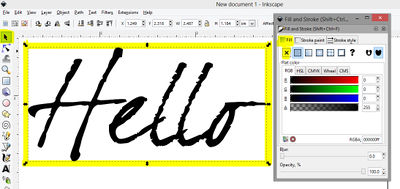
And change to color to red (255) | And change to color to red (255) | ||
[[File:18_how-to-prep_inkscape_text-tool.jpg]] | [[File:18_how-to-prep_inkscape_text-tool.jpg|400px]] | ||
| Line 79: | Line 90: | ||
and close window. | and close window. | ||
[[File:19_how-to-prep_inkscape_text-tool.jpg]] | [[File:19_how-to-prep_inkscape_text-tool.jpg|400px]] | ||
| Line 90: | Line 101: | ||
'''9.''' While still selecting your text, go to the menu and choose object > ungroup. | '''9.''' While still selecting your text, go to the menu and choose object > ungroup. | ||
[[File:20_how-to-prep_inkscape_text-tool.jpg]] | [[File:20_how-to-prep_inkscape_text-tool.jpg|400px]] | ||
'''8.''' and then go to menu and choose path > union. | '''8.''' and then go to menu and choose path > union. | ||
[[File:21_how-to-prep_inkscape_text-tool.jpg]] | [[File:21_how-to-prep_inkscape_text-tool.jpg|400px]] | ||
You can now see that all the overlapping letters are merged together. | You can now see that all the overlapping letters are merged together. | ||
[[File:22_how-to-prep_inkscape_text-tool.jpg]] | [[File:22_how-to-prep_inkscape_text-tool.jpg|400px]] | ||
| Line 117: | Line 130: | ||
Corners: 5, spoke ratio: 0.350, Rounded: 0, Randomized: 0 | Corners: 5, spoke ratio: 0.350, Rounded: 0, Randomized: 0 | ||
| Line 123: | Line 137: | ||
[[File:1_inkscape-how-to-make-namesticker.jpg|400px]] | [[File:1_inkscape-how-to-make-namesticker.jpg|400px]] | ||
| Line 141: | Line 158: | ||
[[File:3_inkscape-how-to-make-namesticker.jpg|400px]] | [[File:3_inkscape-how-to-make-namesticker.jpg|400px]] | ||
| Line 146: | Line 165: | ||
Or hit the shortcut keys [ctrl] + [A] | Or hit the shortcut keys [ctrl] + [A] | ||
| Line 165: | Line 185: | ||
'''14.''' Go to the menu and choose file > save as... | '''14.''' Go to the menu and choose file > save as... | ||
[[File:30_how-to-prep_inkscape_saving-as-pdf.jpg]] | [[File:30_how-to-prep_inkscape_saving-as-pdf.jpg|200px]] | ||
| Line 174: | Line 196: | ||
Then hit the save button. | Then hit the save button. | ||
[[File:31_how-to-prep_inkscape_saving-as-pdf.jpg]] | [[File:31_how-to-prep_inkscape_saving-as-pdf.jpg|400px]] | ||
| Line 181: | Line 205: | ||
And you need to make sure that '''export as drawing is checked''', not as page | And you need to make sure that '''export as drawing is checked''', not as page | ||
[[File:32_how-to-prep_inkscape_saving-as-pdf.jpg]] | [[File:32_how-to-prep_inkscape_saving-as-pdf.jpg|400px]] | ||
Revision as of 11:45, 14 August 2014
English • Deutsch • français • español • íslenska • 日本語 • Nederlands • norsk • galego • føroyskt • Türkçe •
Setting document size
1. Go to menu > file > document properties.
2. Switch the units from px (pixels) to centimeters (cm)
And change the width to 10 cm and height 6 cm.
Hit enter and close this window.
Type your name
3. Choose the typetool from the toolbar. Click on your document and type in your name.
4. Change the font into something fun by selecting the text
and then you can choose something different in the popdown menu at the top of the screen.
Switch letters to outline
5. Switch back to the black mouse from the toolbar and select your text.
Now go to the menu and choose path > object to path.
6. Next step is to open the fill and stroke window.
There is a little brush icon (usually) on the right side of the screen.
Or use the shortcut [SHIFT] + [CTRL] + [F]
Now, while you still have the text selected, go to the 'fill' tab and click on the [X] button.
It should make your selected text disappear.
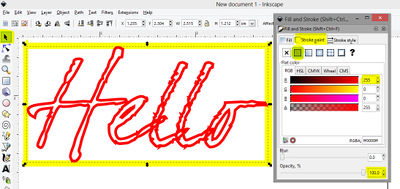
7. Go to the stroke paint tab. And click on the [box] button.
Now you should see your text again, but in outline.
And change to color to red (255)
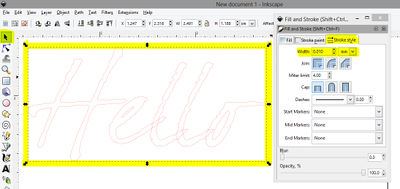
8. Now switch to the stroke style tab.
Change the units to mm, type in 0.01 and hit [enter]
and close window.
Merging letters to one shape
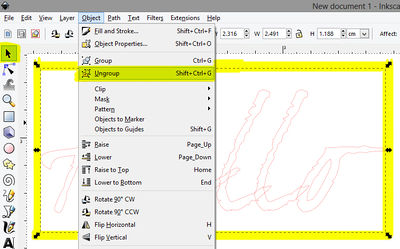
9. While still selecting your text, go to the menu and choose object > ungroup.
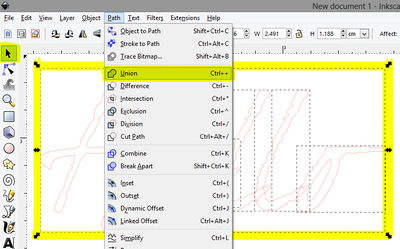
8. and then go to menu and choose path > union.
You can now see that all the overlapping letters are merged together.
Pimp your letters
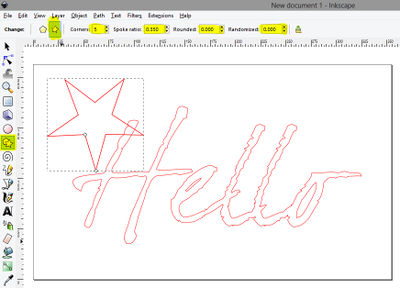
9. Lets make the letter a little bit cooler. You can use the star, circle or square tool from the toolbar to draw shapes.
To make a star: select the star tool from the toolbar.
Change the settings in the top of the screen to:
Corners: 5, spoke ratio: 0.350, Rounded: 0, Randomized: 0
You can try out different settings to create different shapes.
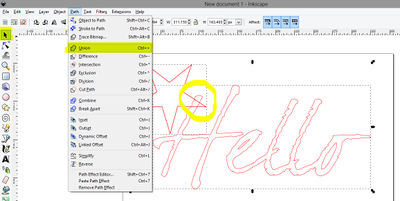
10. When shapes overlap each other, remember to merge them back into one shape again.
So, pick the black mouse from the toolbar and select both shapes. Then go to the menu en select union.
Important before saving
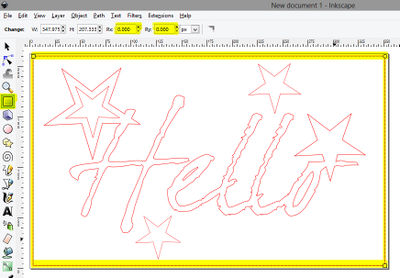
11. When you are happy with you design, as final design step you select the box tool from from the toolbar and draw a box around you work.
12. Switch to the black mouse again and select all of you work.
Or hit the shortcut keys [ctrl] + [A]
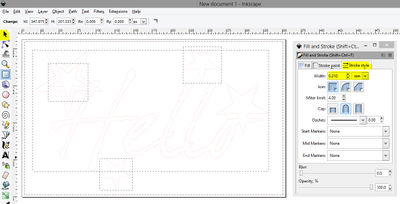
13. Open up the fill and stroke window again. The shortcut keys are [shoft] + [ctrl] + [F]
And make sure within the stroke style tab that all the lines are 0.01 mm
Saving as PDF
14. Go to the menu and choose file > save as...
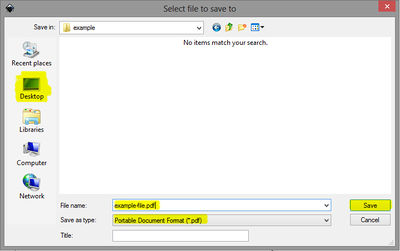
15. Choose the desktop as location to the file.
Type in a descriptive file name, and select PDF as file format.
Then hit the save button.
16. In this second dialogue window make sure the standard resolution setting is 600.
And you need to make sure that export as drawing is checked, not as page
