Inkscape quick start guide: Difference between revisions
m →Preparing text as vector: shortening the steps |
→Drawing (tracing) by hand using the bezier tool: adding in more images |
||
| Line 265: | Line 265: | ||
Roughly trace the shape (keep clicking once, several times) and double click to finish. | Roughly trace the shape (keep clicking once, several times) and double click to finish. | ||
[[File:25_how-to-prep_inkscape_drawing-pen-tool.jpg|400px]] | [[File:25_how-to-prep_inkscape_drawing-pen-tool.jpg|400px]][[File:inkscape-drawing-by-hand.jpg|400px]] | ||
| Line 282: | Line 283: | ||
When 1 is selected, click in the top icon menu bar on the node icon with the 2 handles. | When 1 is selected, click in the top icon menu bar on the node icon with the 2 handles. | ||
[[File:inkscape-drawing-by-hand-screenshot-program.jpg|600px]] | |||
[[File:27_how-to-prep_inkscape_drawing-pen-tool.jpg|200px]] | [[File:27_how-to-prep_inkscape_drawing-pen-tool.jpg|200px]] | ||
| Line 304: | Line 306: | ||
[[File:29_how-to-prep_inkscape_drawing-pen-tool.jpg|400px]] | [[File:29_how-to-prep_inkscape_drawing-pen-tool.jpg|400px]] | ||
== Saving as PDF == | == Saving as PDF == | ||
Revision as of 14:55, 6 November 2014
English • Deutsch • français • español • íslenska • 日本語 • Nederlands • norsk • galego • føroyskt • Türkçe •
To download inkscape, visit: http://www.inkscape.org
And download PDF : Inkscape beginners tutorial - short
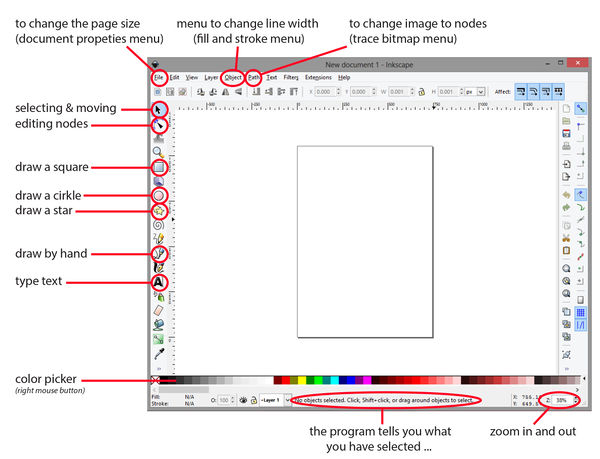
screenshot program
Setting document size
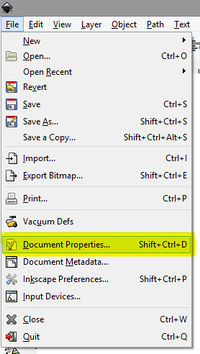
1. Go to menu > file > document properties.
2. Switch the units from px to your preference (cm or mm)
Then change the width and height.
- lasercutter - Epilog_Mini_24 : 60 x 30 cm
- vynilcutter - Roland_GX-24_CAMM-1 : 58 cm wide
And close this window.
1. Go to menu > object > fill and stroke.
- Lasercutting / Vynilcutting : no �fill > set stroke in red with a line width of 0.01 mm.
- Laser engraving (raster) : no stoke > set fi�ll on black color.
Changing image to vector using trace bitmap option
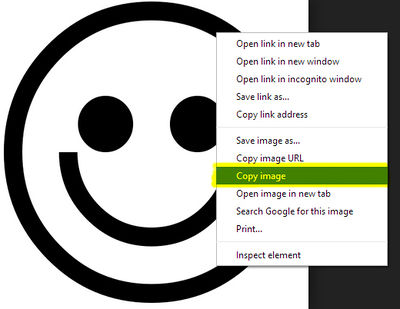
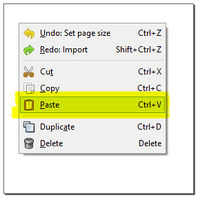
1. Find an image on the internet. Right click and choose copy image.
2. In inkscape, right click and choose paste.
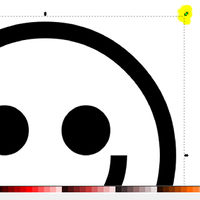
3. If image is to big, drag on the corner arrows to get it smaller.
Holder [CTRL] key while doing that, to keep the image in proportions.
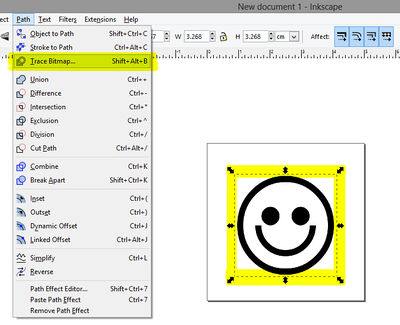
4. While the image is selected, go to the menu and choose path > trace bitmap
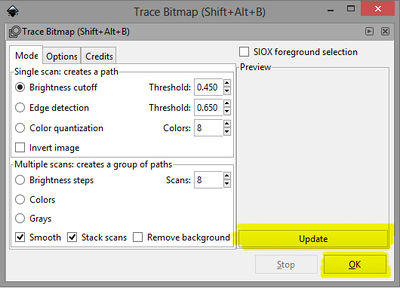
5. In this new window, first click on the update button to get a preview.
You can mess with the various settings to get a good preview.
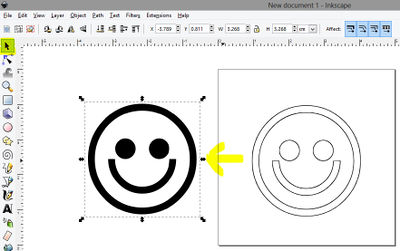
For my example to work: I changed it to edge detection. Different settings work for different images, try changing stuff and update again.
When happy, click ok and close the window.
6. Make sure you still have the black colored mouse selected in the toolbar.
Then click on the image and drag it to the side.
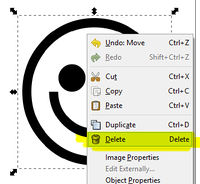
7. Right mouse click on the image you used dragged to the side and choose delete.
8. The lined shape that stayed behind is a vector shape.
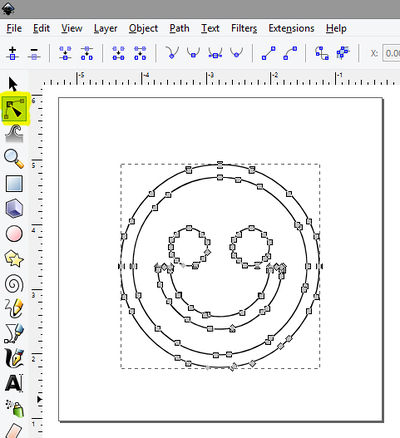
You can now edit the shape if you want, select the edit mouse from the toolbar and click on the shape.
The little squares that now appear (called nodes) can be changed and dragged around to where ever you like.
Cleaning up image using break apart option
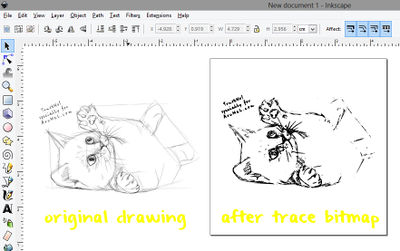
1. Sometimes a trace bitmap result looks a bit messy, and needs a bit of cleaning up.
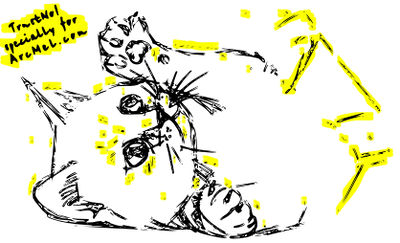
Here is a drawing example, copied into inkscape.
The end result is nice, but up close you can see there is a lots to improve.
Let say I want to remove the area’s highlighted in yellow.
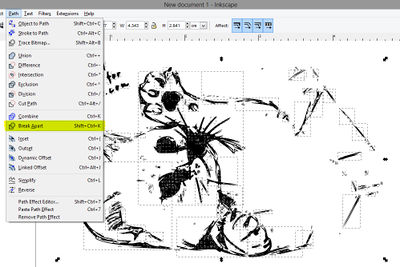
2. Select your shape, and in the menu go to path > break apart.
The image shoud break apart in a lots of little parts.
If it does not work, it could be that you object is still within a group. Then first choose within the menu object > ungroup.
3. You can now select the shapes you want to delete.
Holding the [shift] button while selecting, can help you select multiple objects.
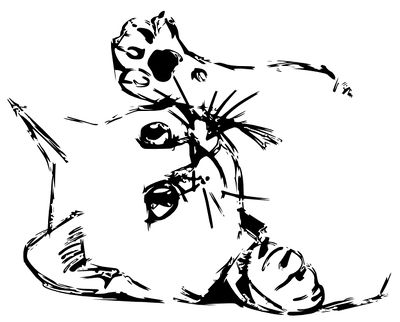
And after some clicking and deleting, my end result is:
Preparing text as vector
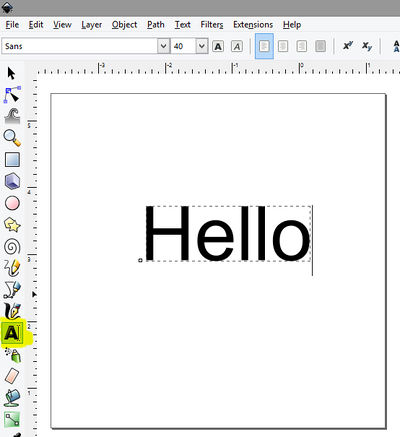
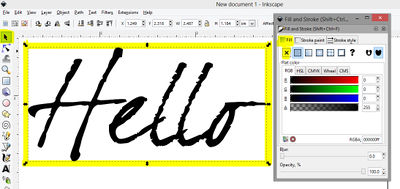
1. Choose the type tool from the toolbar. Click on your document and start typing.
2. Change the font into something fun by selecting the text
and choosing something different in the popdown menu at the top of the screen.
3. When ready, switch back to the black mouse from the toolbar and select your text.
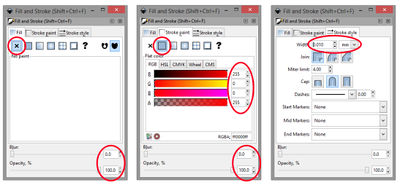
4. Next step is to open the fill and stroke window.
There is a little brush icon (usually) on the right side of the screen. Or shortcut [SHIFT] + [CTRL] + [F]
Now, while you still have the text selected, to the the 'fill' tab and click on the [X] button. It should make your selected text disappear.
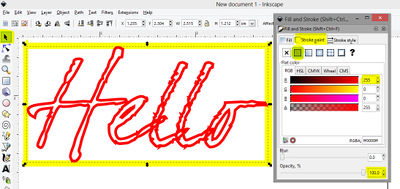
5. Go to the stroke paint tab. And click on the box button. You should see you text again, but now in outline.
Also change to color to red (255) and make sure the opacity is at 100%
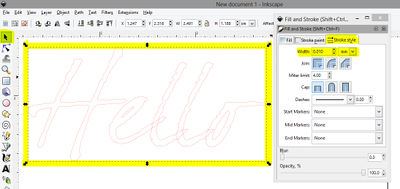
6. The third step is to switch to the stroke style tab.
Change the units to mm, type in 0.01 and hit [enter] and close window.
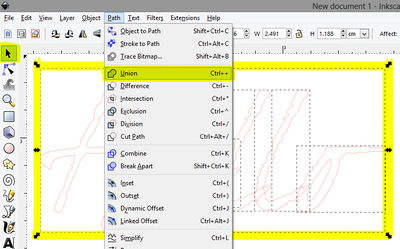
7. Final step is to choose path > union. This will merge all you letters together in one shape.
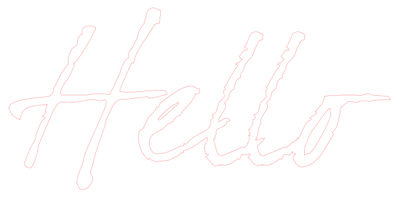
End result:
Drawing (tracing) by hand using the bezier tool
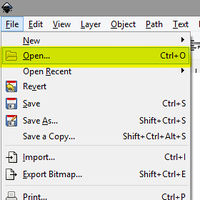
1. Start by opening up a image. In the menu choose file > open, select the right file and click open.
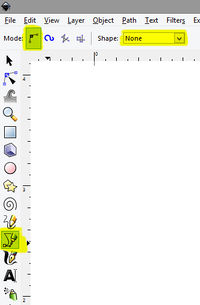
2. From the toolbar choose the bezier tool.
Make sure the mode and shape option at the top of the screen are set on standard.
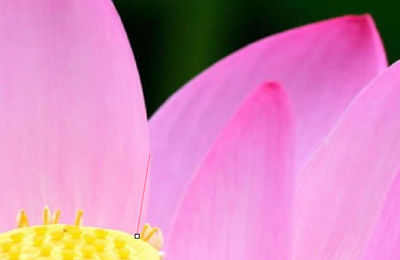
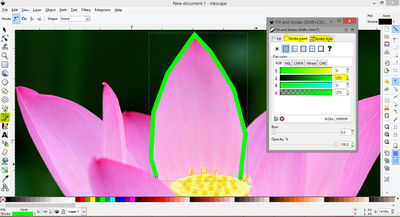
3. For this example I will use a photo of a flower. Let start by tracing one of the leaves.
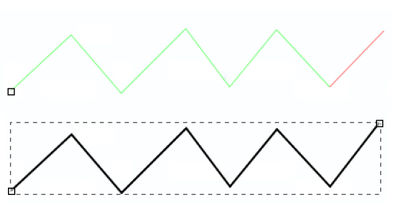
On the starting point click once, move your mouse along the shape, and click again.
Roughly trace the shape (keep clicking once, several times) and double click to finish.
4. Use the fill and stroke options to change the color and line width to your own preferences. shortcut to open window: [SHIFT] + [CTRL] + [F]
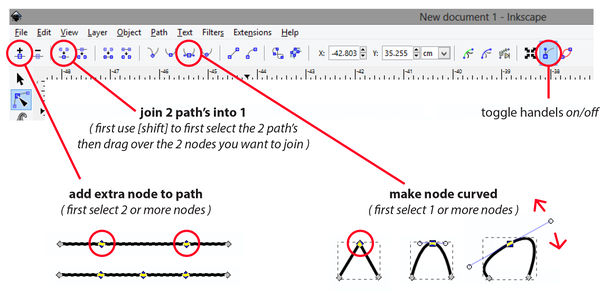
5. To make the line smooth, first change to the edit mouse from the toolbar.
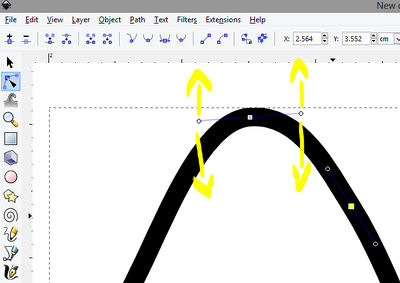
With this tool selected, click on one of the nodes (squares) to select it.
When 1 is selected, click in the top icon menu bar on the node icon with the 2 handles.
6. Click first on each node than select one of the icons from the top bar. Keep going until you're happy with the shape.
Try out different icons from the top menu bar to get different results.
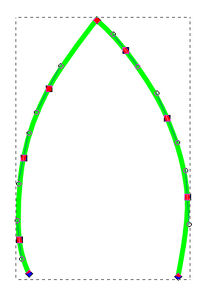
With the edit mouse selected you can also click and drag on each handle, to manipulate a part of the line. This may take so practice.
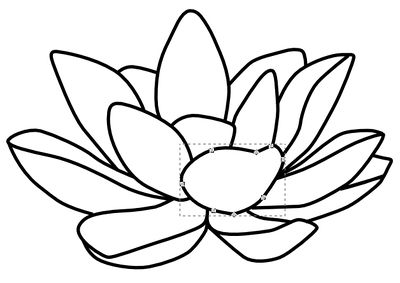
End result:
Saving as PDF
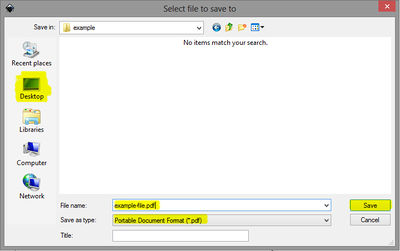
1. Go to the menu and choose file > save as...
2. Choose where you want to save the file, on public computers a good place is (usually) the desktop.
Type in a descriptive file name, and select PDF as file format. Then hit the save button.
3. In this dialog window make sure the standard resolution setting is 600.
And you need to choose if you want to export as drawing or as page.
if unsure, export as drawing. (You can always fix the size later on if necessary.) Hit ok when ready.
- Exporting as drawing: will mean you document size will be as big or as small as you drawing. So it will ignore any document properties settings.
- Exporting as page: will mean it will export your document properties settings. So you're drawing will get cut if a part is drawn outside the document window.
Tips for saving file for laser cutter
For cutting out shapes, line width needs to be 0.01 mm
- You can change this by fist selecting your artwork [ctrl] + [A]
- Then open up the fill and stroke menu [shift] + [crtl] + [F]
- Go to the stroke style tab and change the width to 0.01 mm and hit [enter]
For engraving (filled) shapes without accentually cutting, make sure the stoke style is turned off.
- You can change this by fist selecting your artwork [ctrl] + [A]
- Then open up the fill and stroke menu [shift] + [crtl] + [F]
- Go to the stroke paint tab and click on the X (no paint)
- Then go to the fill tab en click on the cube (flat colour)
- Also check in this tab is the opacity is at 100%
The documents colour mode needs to be in RGB not CMYK (inkscape standard is RGB)
Read more laser cutter: Epilog_Laser
Tips for saving file for vinyl cutter
When you convert an image via trace bitmap option, make sure you clean up all the noise.
- You can change this by fist selecting your artwork [ctrl] + [A]
- Make sure you shapes are not grouped by [shift] + [ctrl] + [G]
- Then break apart your object [shift] + [ctrl] + [K]
- Now you can select the small part and delete them
- or union them with the main shape by selecting both shapes and [shift] + [ctrl] + [+]
If you use text make sure the font is outlined and joint into one shape for a nice result.
- You can change this by fist selecting your artwork [ctrl] + [A]
- Then send the text object to path by [shift] + [ctrl] + [C]
- Make sure you shapes are not grouped by [shift] + [ctrl] + [G]
- Join the letter together by union [shift] + [ctrl] + [+]
Fills are not necessary in stickers, it a good habit to export you drawing as a outline.
With only line visible you can easily see is there are not weird overlapping line that will mess up you sticker.
