Eagle: Difference between revisions
Jump to navigation
Jump to search
No edit summary |
|||
| Line 68: | Line 68: | ||
**the one from Sparkfun.lbr ([http://www.opencircuits.com/SFE_Footprint_Library_Eagle] version 2011 ( [https://github.com/sparkfun/SparkFun-Eagle-Library/blob/master/SparkFun.lbr?raw=true right click on this link, save link as]) | **the one from Sparkfun.lbr ([http://www.opencircuits.com/SFE_Footprint_Library_Eagle] version 2011 ( [https://github.com/sparkfun/SparkFun-Eagle-Library/blob/master/SparkFun.lbr?raw=true right click on this link, save link as]) | ||
**[http://www.mikrocontroller.net/attachment/68243/atmel-new.lbr Attiny 44 library] | **[http://www.mikrocontroller.net/attachment/68243/atmel-new.lbr Attiny 44 library] | ||
===Materials used=== | |||
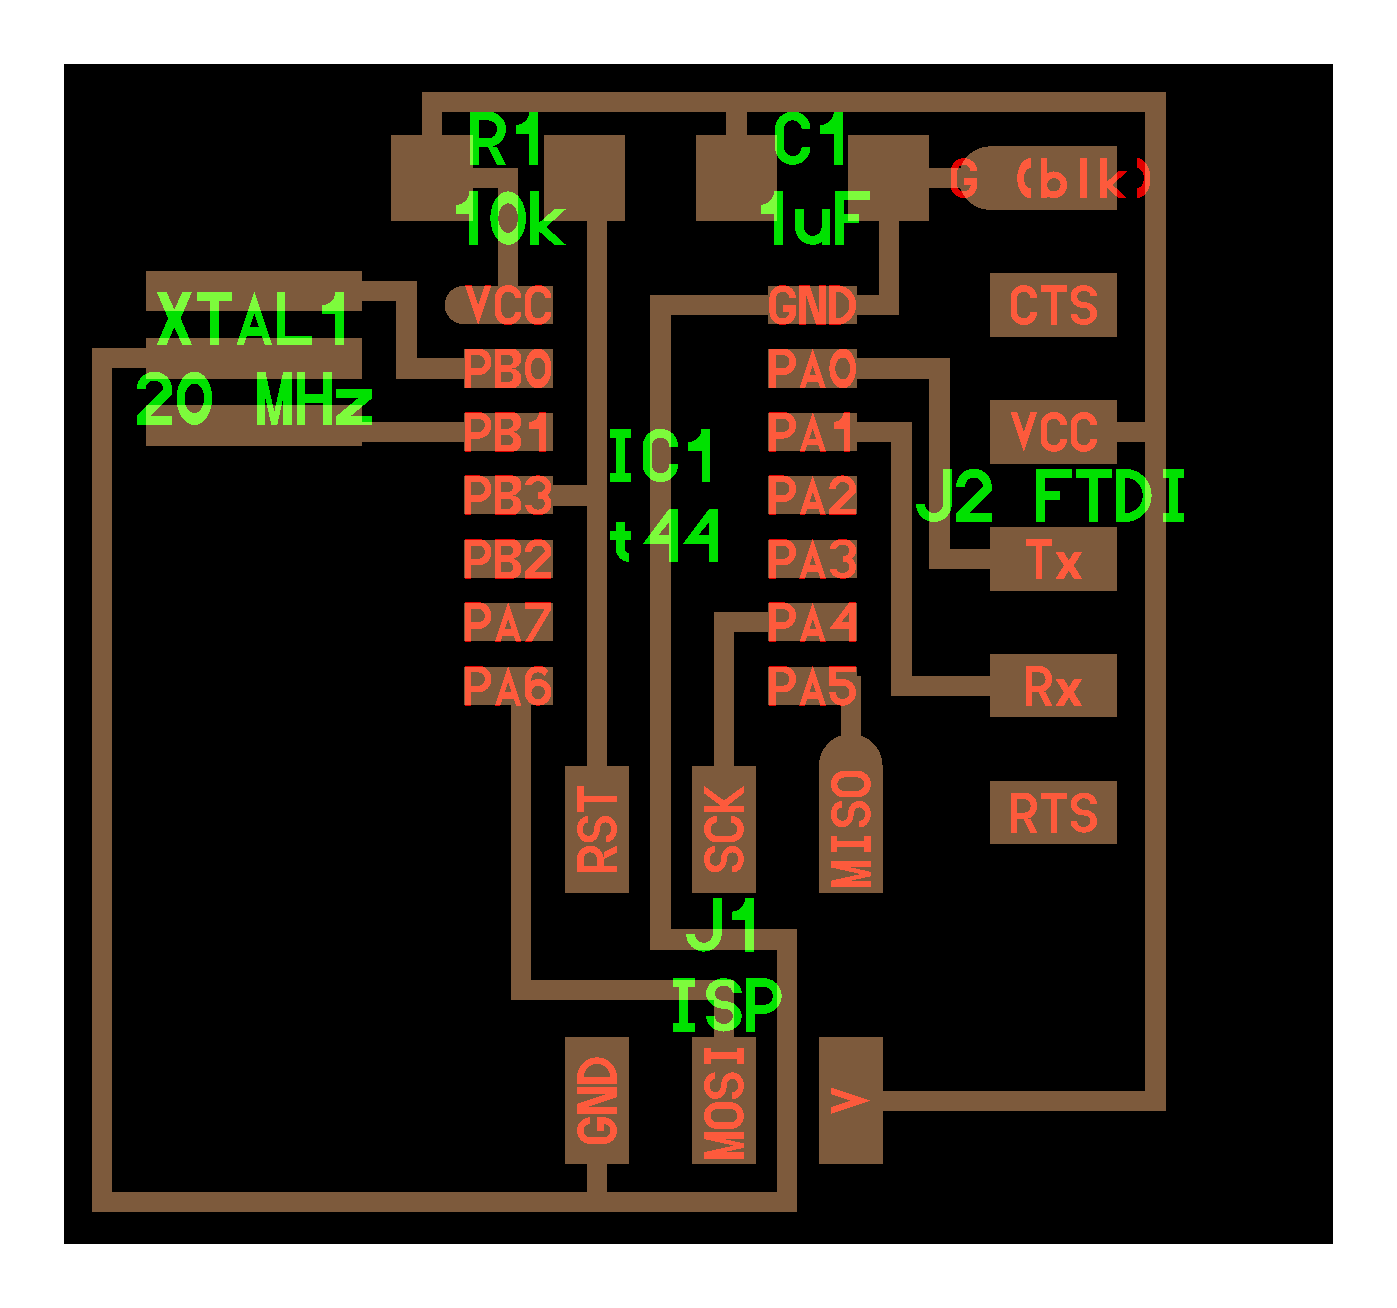
*IC1 = ATtiny44_SOIC('IC1\nt44') | |||
* R1 = R_1206('R1\n10k') | |||
*C1 = C_1206('C1\n1uF') | |||
*XTAL = Crystal 20 MHz | |||
*FTDI connector (6 pin) | |||
*Header (2*3 pin) | |||
==Links== | ==Links== | ||
Revision as of 13:29, 7 March 2011
See version in Icelandic eagle kennsluefni

Download and install Eagle
Designing circuits with Eagle
Open Eagle
- Select New Project
- Select New Schematic
Open library
- Open library, click Use
- Download from the internet a library or select on in the computer the library that we will be using (e.g. NG.lbr[1] or the one from Sparkfun.lbr ([2] version 2011 ( right click on this link, save link as)
- SelectAdd, then you can open the library
- (if you don't find your thing you could also click on "Use")
- Open NG.lib library for Fab Lab projects.
Tour for the Eagle on CadSoft site
- Select the things you want to use and click Add to get the components.
- You can select different view by clicking on Board
- You can select object by rightclicking them and selecting packning
- Connect objecs by clicking Wire and make wire between objects.
- It can be good to make connections and get a sign for Ground and put where it should be GND.
- View Grid select the size of the grid, it should be around (0,025 inches)
- Move to move object or line.
- Delete to remove object or line and so on.
- Junction Connection point .
- You can right click objects and select value to put
- hægt að hægri smella á hluti og velja value til að setja inn gildi s.s. fyrir þétta.
- hægri smella og velja properties til að endurnefna.
- Til að athuga hvort hlutur sé rétt tengdur er gott að prófa að hreyfa hlutinn.
- ERC Error correction villuleit.
Raða hlutum upp
Add
- Frame til að setja ramma utan um teikninguna.
- raða hlutum
- smella á Auto
- Velja Bottom N/A
Ef þetta raðast ekki rétt hægt að velja línur með þvi hægri smella og velja rip off
- TX transmit
- DTR data terminal ready
- Rx Recieve
- Miso -master in slave out
- Mosi master out slave in
- sck system clock
- MOSI (3) GND (2) MISO (1) |
- -RESET (4) SCK (5)
Project 1
- Download libraries
- NG.lbr[3]
- the one from Sparkfun.lbr ([4] version 2011 ( right click on this link, save link as)
- Attiny 44 library
Materials used
- IC1 = ATtiny44_SOIC('IC1\nt44')
- R1 = R_1206('R1\n10k')
- C1 = C_1206('C1\n1uF')
- XTAL = Crystal 20 MHz
- FTDI connector (6 pin)
- Header (2*3 pin)