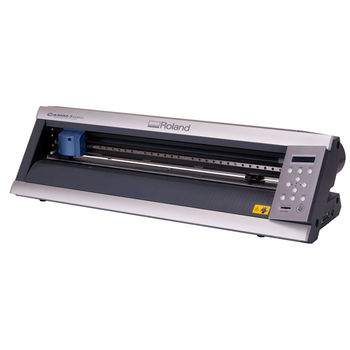
Difference between revisions of "Roland GX-24 CAMM-1"
From Fab Lab Wiki - by NMÍ Kvikan
m (typo) |
m (renaming links) |
||
| Line 38: | Line 38: | ||
<!--T:10--> | <!--T:10--> | ||
| − | *Vinylcutter basics | + | *Vinylcutter basics: [[How_to_use_the_Roland_GX-24|How to use the Roland vinylcutter]] |
| − | *Vinylcutter basics in Icelandic | + | *Vinylcutter basics in Icelandic: [[Skera_út_límmiða#skref fyrir skref með mynd|Skera út límmið]] |
| − | *Inkscape Basics | + | *Inkscape Basics: [[Inkscape_tutorial#Changing_image_to_vector_using_trace_bitmap_option|How to change image to vector in inkscape]] |
| − | *Inkscape Basics: | + | *Inkscape Basics: [[Inkscape_how_to_make_name_sticker|How to make name sticker in Inkscape]] |
=== Tips === <!--T:11--> | === Tips === <!--T:11--> | ||
Revision as of 10:46, 14 August 2014
Contents
Overview
The Roland GX-24 CAMM-1 is a drag knife cutter. You can feed the machine vinyl sticker material for creating custom sized stickers. You can also feed it copper sticker material, useful for flexible circuits or antenna design. The machine can take a material on roll or a piece with the maximum width of 58 centimeters. You will need to prepare a vector graphics file in the shape you want to cut. The vector design file needs exported to PDF file format.
Technical specifications
| Roland GX-24 CAMM-1 | |
|---|---|
| Maximum cutting width: | 58 cm |
Usage machine
Portal:Safety: Do not put your hands near the tool path unless you are sure that the machine is not going to move!
How to prepare a vector file PDF
- set all vector lines to line width 0.01 mm
- document needs to be on RGB color setting (not CMYK)
- when using text, outline the font, and merge the letters to one shape
Tutorials
- Vinylcutter basics: How to use the Roland vinylcutter
- Vinylcutter basics in Icelandic: Skera út límmið
- Inkscape Basics: How to change image to vector in inkscape
- Inkscape Basics: How to make name sticker in Inkscape
Tips
- put the design in outlines (no fill's) so you can see that there are not accidentally unwanted overlapping lines.
- For better control of where to cut on your material: crop document size to drawing size
